


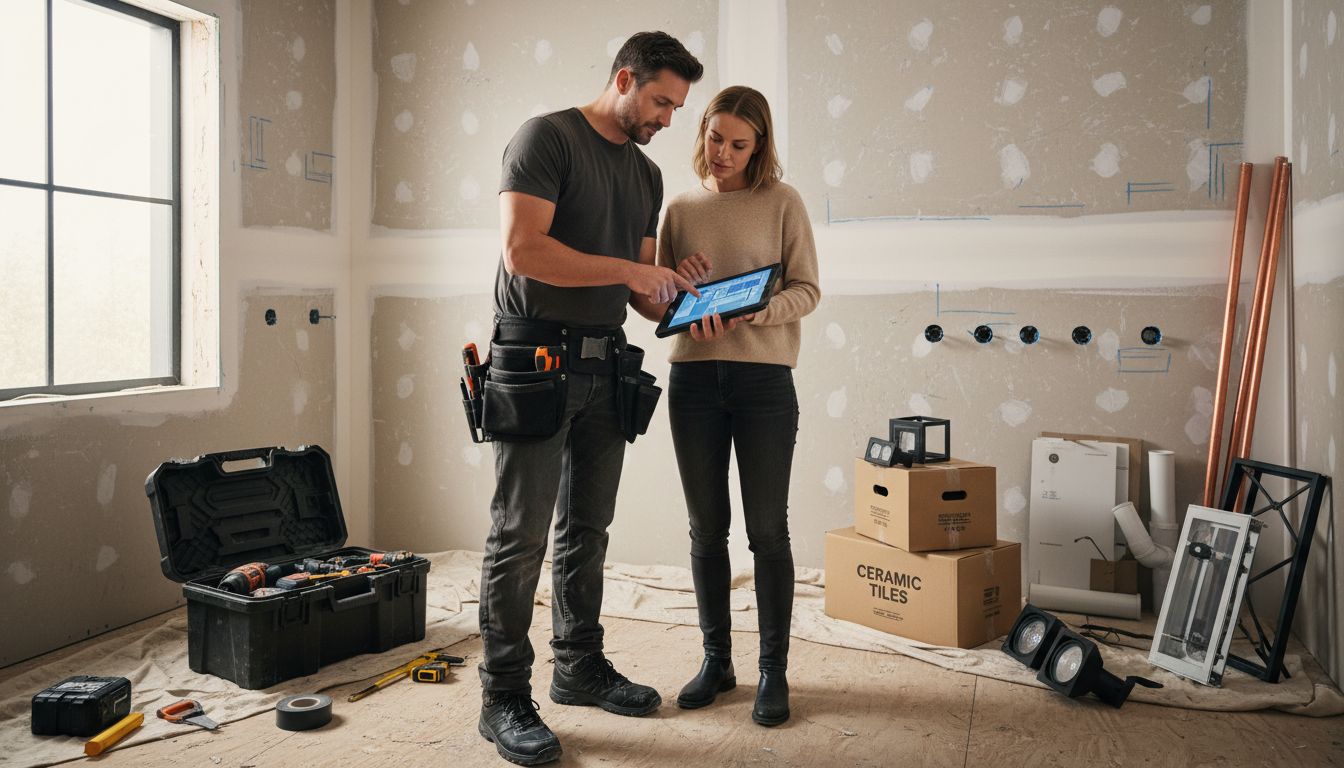
Over half of american homeowners say a bathroom remodel is their most desired improvement, yet many jump in without a clear plan and end up frustrated. Tearing out old tile or buying shiny fixtures is less important than having a smart strategy from day one. Whether you want better storage, more comfort, or a total refresh, you will find practical advice here to guide every step of your bathroom renovation so your results look stunning and work perfectly.
Table of Contents
- Step 1: Plan Your Bathroom Renovation Layout
- Step 2: Select and Order Essential Materials
- Step 3: Demolish Old Fixtures and Surfaces
- Step 4: Install Plumbing and Electrical Systems
- Step 5: Apply New Surfaces and Fixtures
- Step 6: Inspect and Finalize the Renovated Bathroom
Quick Overview
| Main Insight | Detailed Explanation |
|---|---|
| 1. Plan Your Layout Carefully | Measure your space and create a layout that optimizes fixture placement and ensures ease of movement, considering aesthetics and function. |
| 2. Choose Quality Materials | Select durable materials that meet building codes and suit your style to enhance the renovation’s overall look and longevity. |
| 3. Hire Professionals for Installations | For plumbing and electrical work, hire licensed professionals to prevent hazards and costly mistakes in compliance with safety standards. |
| 4. Systematically Demolish | Carefully remove old fixtures and surfaces, protecting adjacent areas, and check for structural issues before starting your renovation. |
| 5. Conduct a Thorough Final Inspection | Ensure all fixtures and systems are functioning with no leaks, verifying aesthetics and alignment to achieve a polished outcome. |
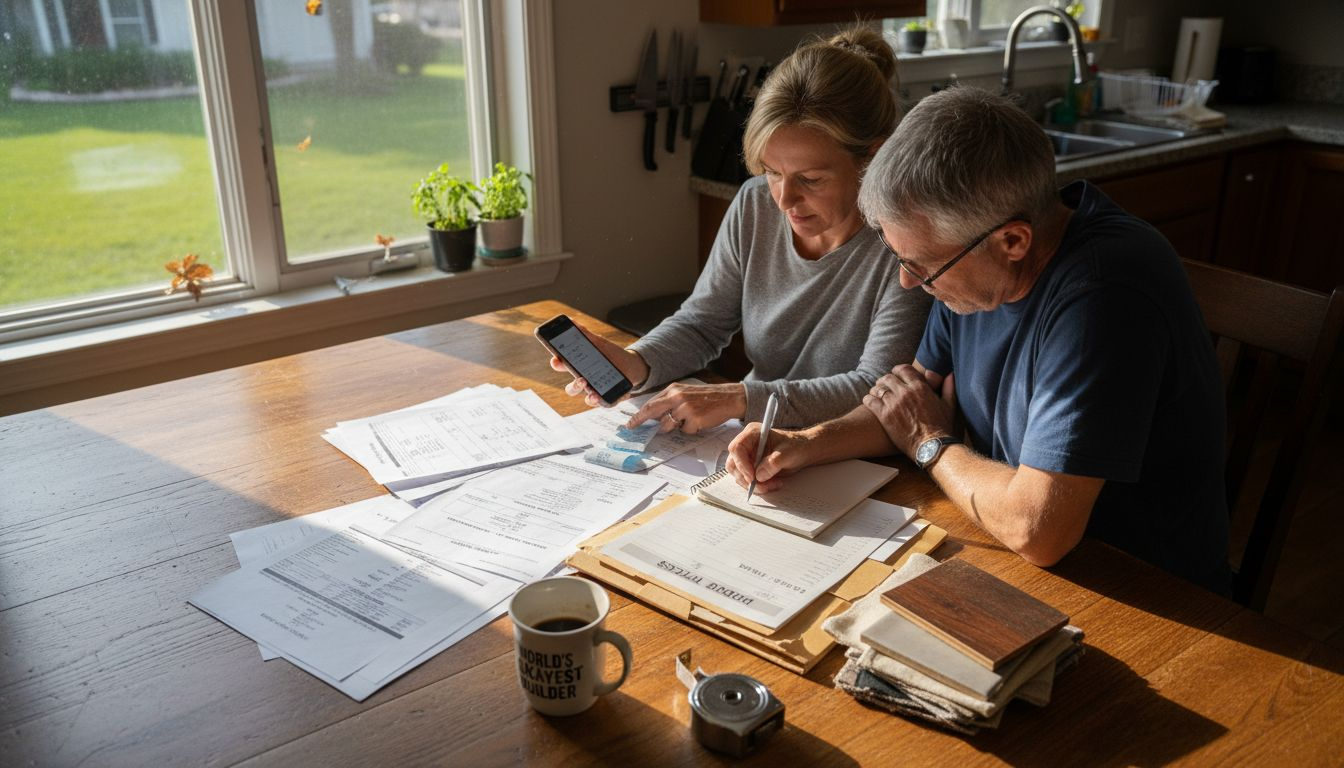
Step 1: Plan Your Bathroom Renovation Layout
Planning your bathroom renovation layout is the foundational step that transforms your vision into a functional and stylish reality. According to remplanner, this process requires balancing aesthetics, functionality, and personal comfort.
Start by measuring your existing bathroom space precisely and creating a detailed sketch or digital floor plan. Your layout should optimize every square inch, considering critical elements like toilet placement, shower or bathtub location, vanity positioning, and potential storage solutions. Fiona Duffy recommends focusing on traffic flow and ensuring at least 21 inches of clear space in front of fixtures for comfortable movement.
Pro tip: Before finalizing your layout, create a cardboard mockup or use digital design tools to visualize how different configurations will feel. This step helps you identify potential issues like cramped spaces or awkward walking paths before investing in expensive renovations. Remember that a well-planned layout not only looks great but also significantly enhances your daily bathroom experience.
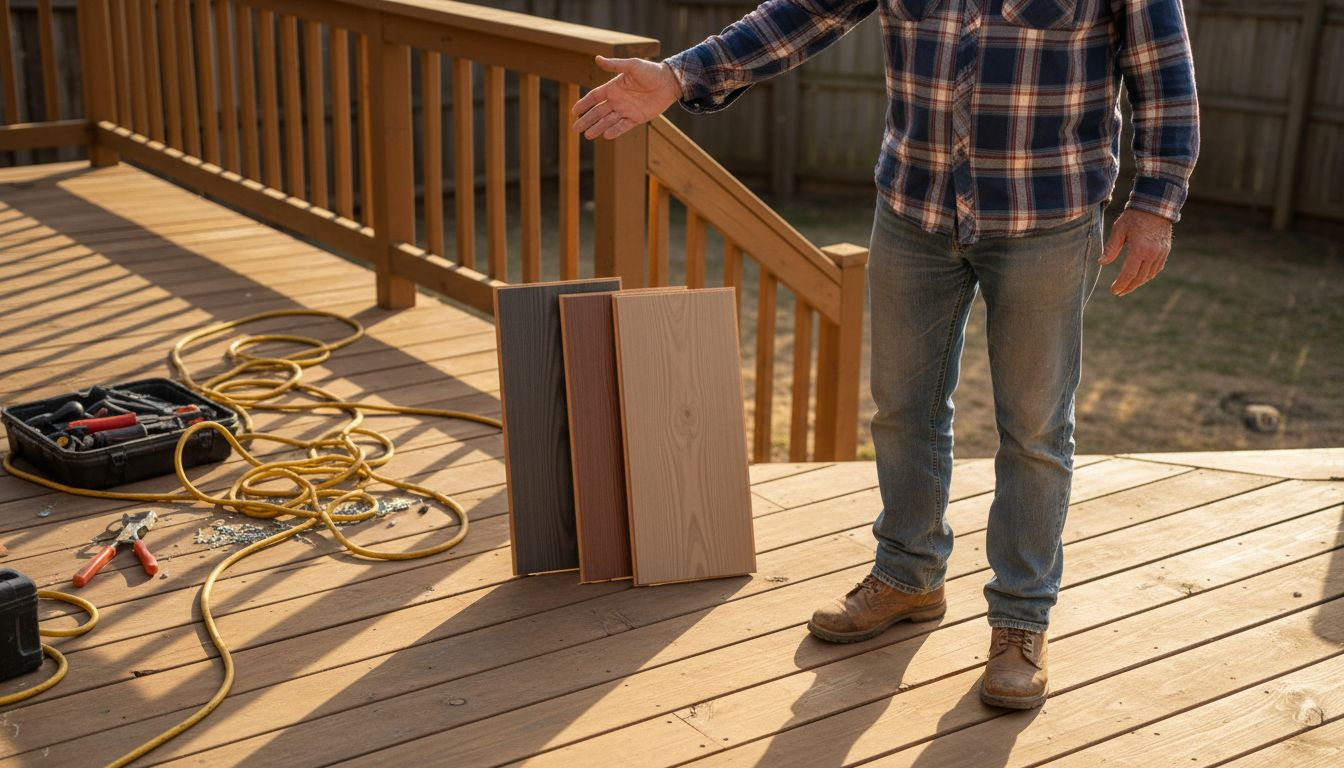
Step 2: Select and Order Essential Materials
Selecting and ordering the right materials is a critical phase that will determine the quality and aesthetic of your bathroom renovation. Rona emphasizes the importance of carefully identifying your needs and drawing inspiration before making any purchasing decisions.
Start by creating a comprehensive materials list that includes tiles, fixtures, vanities, lighting, plumbing components, and finishes. Consider both durability and visual appeal when choosing materials. Kiyo Group recommends prioritizing materials that combine compliance with building standards, functional performance, and aesthetic appeal. Take accurate measurements of your bathroom space to ensure precise ordering and minimize waste.
Pro tip: Always order slightly more materials than your exact measurements require to account for potential cutting, breakage, or unexpected challenges during installation. This buffer helps prevent project delays and ensures you have replacement materials if needed. Your next step will involve coordinating delivery and preparing for the actual renovation process.
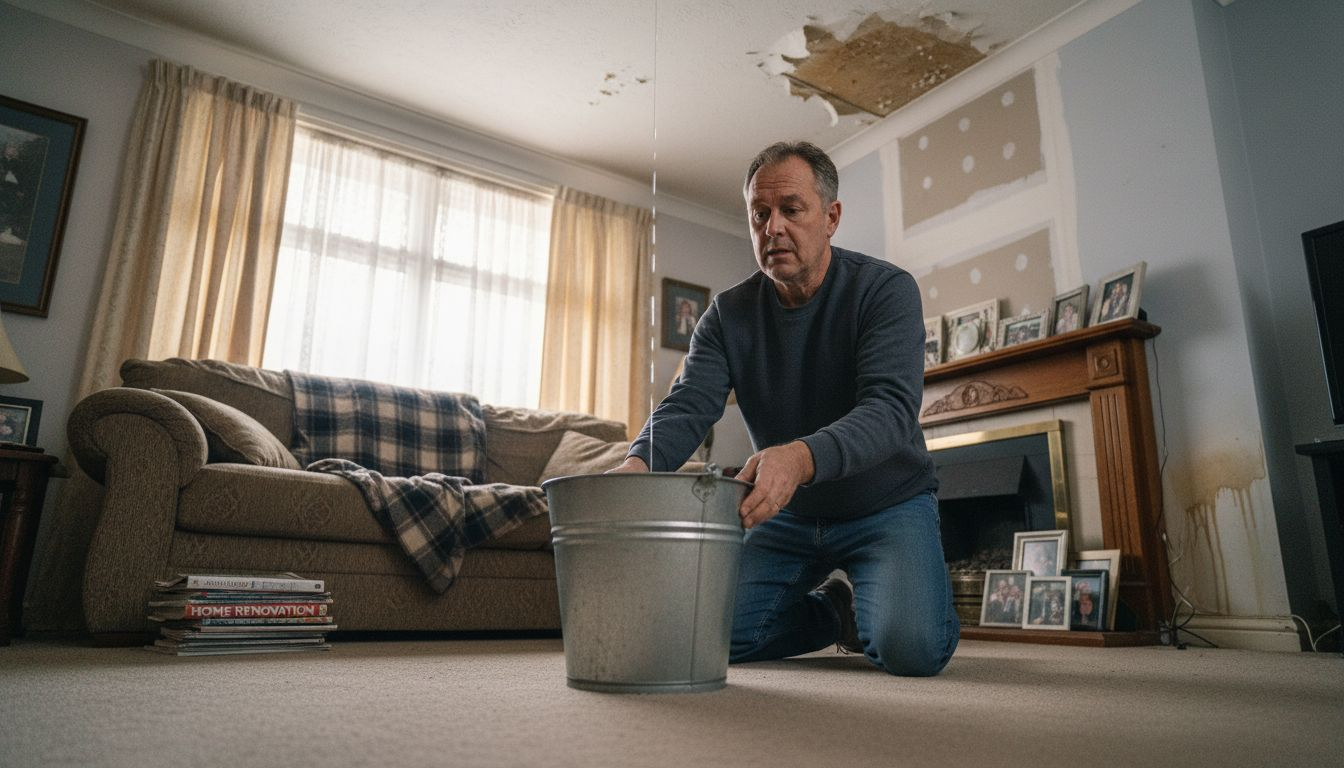
Step 3: Demolish Old Fixtures and Surfaces
Demolishing old bathroom fixtures and surfaces is a critical preparatory stage that sets the foundation for your renovation project. Bathroom Remodeling Teacher recommends approaching this phase with careful planning and systematic execution to ensure a smooth transformation.
Begin by turning off all water and electrical connections to prevent potential hazards. Carefully remove existing fixtures like toilets, sinks, and shower units using appropriate tools such as pry bars, hammers, and utility knives. The Architecture Designs suggests protecting adjacent areas with plastic sheeting and wearing protective gear including safety glasses, dust masks, and work gloves. Pay close attention to underlying structures as you remove tiles and surfaces inspecting for any water damage, mold, or structural issues that might require additional repair.
Pro tip: Work methodically from top to bottom and create designated areas for debris removal to maintain an organized workspace. Rent a dumpster or arrange for proper waste disposal in advance to streamline the cleanup process. This careful demolition sets the stage for your upcoming installation of new bathroom components and ensures a clean slate for your renovation project.
Step 4: Install Plumbing and Electrical Systems
Installing plumbing and electrical systems is a complex phase that requires precision and professional expertise to ensure safety and functionality in your bathroom renovation. Bathroom Remodeling Teacher emphasizes the critical importance of following local building codes and obtaining necessary permits before beginning any installation work.
Start by mapping out your new plumbing and electrical layouts according to your renovation plan. Carefully route new water supply lines, drain pipes, and electrical conduits to accommodate your new fixtures and lighting. The Architecture Designs recommends working systematically and ensuring proper ventilation for electrical components. For plumbing, use copper or PEX pipes with appropriate connections, and for electrical work, install waterproof junction boxes and ground fault circuit interrupter (GFCI) outlets to meet safety standards.
Pro tip: Unless you are a licensed plumber or electrician, hire professionals for this critical stage. Improper installation can lead to water damage, electrical hazards, and costly repairs down the line. These systems form the backbone of your bathroom renovation, and professional expertise will ensure everything is installed correctly and safely. Your next step will involve preparing for the installation of new fixtures and finishes.
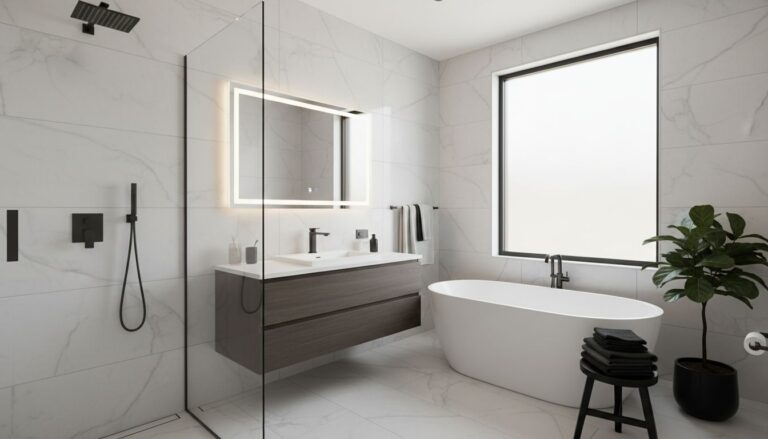
Step 5: Apply New Surfaces and Fixtures
Applying new surfaces and fixtures is the transformative stage that brings your bathroom renovation vision to life. Bathroom Remodeling Teacher emphasizes the importance of thorough preparation and precise installation techniques to achieve a professional finished result.
Begin by installing a waterproof backing board for tiles, ensuring a smooth and moisture resistant foundation. Carefully lay tiles using high quality thinset mortar, maintaining consistent grout lines and checking for level surfaces throughout the process. The Architecture Designs recommends taking time to meticulously place fixtures like the vanity, toilet, shower enclosure, and sink. Pay special attention to alignment and secure mounting to prevent future issues with water leakage or structural instability.
Pro tip: Always test fit fixtures before final installation and use a level to ensure everything is perfectly aligned. Silicone sealant will be your best friend for creating waterproof connections between surfaces and fixtures. This careful approach ensures a polished professional finish that will look great and function perfectly for years to come. Your next step involves adding finishing touches and final inspections to complete your bathroom transformation.
Step 6: Inspect and Finalize the Renovated Bathroom
Inspecting and finalizing your bathroom renovation marks the culmination of your hard work and careful planning. Bathroom Remodeling Teacher emphasizes the critical importance of conducting a comprehensive final review to ensure every aspect of the renovation meets professional standards.
Begin with a systematic walkthrough examining all installed fixtures, surfaces, and systems. Check for proper water pressure, test all electrical outlets and lighting, and verify that plumbing connections are leak free. The Architecture Designs recommends carefully inspecting tile work for consistent grout lines, ensuring waterproof seals around edges, and confirming that all fixtures are level and securely mounted. Pay close attention to details like caulking, paint finish, and overall aesthetic alignment.
Pro tip: Take photographs of the completed renovation for your records and potential future reference. 7 Essential Bathroom Remodel Tips Every Homeowner Needs can provide additional insights into maintaining your newly renovated space. A thorough final inspection ensures your bathroom not only looks stunning but functions perfectly for years to come, giving you peace of mind and satisfaction in your home improvement project.
![]()
Transform Your Bathroom Renovation Vision Into Reality with Expert Help
Planning a bathroom renovation involves crucial steps from carefully designing your layout to selecting the right materials and ensuring flawless installation. If you want to avoid common challenges such as cramped spaces, improper plumbing, or uneven tile work, professional guidance can make all the difference. With a well-executed plan, your bathroom will not only look stunning but also provide lasting comfort and functionality.
Explore how experienced contractors can handle every detail of your project with precision and care. Visit our Home Renovation Archives – J. A. Kelly Contracting Services to discover tailored solutions for your bathroom upgrade. Ready to get started with trusted craftsmanship? Connect with us at https://jakellycontractingservices.ca to schedule a free estimate and turn your renovation dreams into a beautiful reality. Learn more about our commitment to quality by browsing Uncategorized Archives – J. A. Kelly Contracting Services. Your stunning bathroom awaits.
Frequently Asked Questions
What is the first step in planning my bathroom renovation layout?
Start by measuring your existing bathroom space accurately and creating a detailed sketch or digital floor plan. This will help you optimize every square inch and consider the placement of all fixtures for aesthetics and functionality.
How can I ensure I select the right materials for my bathroom renovation?
Create a comprehensive materials list that includes tiles, fixtures, vanities, and plumbing components. Prioritize materials that are durable and visually appealing to enhance both functionality and aesthetic value.
What precautions should I take when demolishing old bathroom fixtures?
Before demolition, turn off all water and electrical connections to prevent hazards. Use protective gear and work methodically, creating designated areas for debris removal to maintain an organized workspace throughout the process.
Why is hiring professionals for plumbing and electrical installation important?
Hiring professionals ensures that plumbing and electrical systems are installed safely and according to local building codes. This prevents future issues such as water damage or electrical hazards, which can be costly to repair.
What should I inspect during the final walkthrough of my renovated bathroom?
Conduct a systematic walkthrough to check all installed fixtures and systems for proper function. Look for water leaks, test electrical outlets, and ensure that all fixtures are level and securely mounted to confirm a polished finish.
How can I maintain my newly renovated bathroom?
Take photographs of your completed renovation for reference, and follow care guidelines for the materials used. Regularly check for signs of wear or water damage to ensure your bathroom remains in great condition for years to come.
Recommended
- What Is Bathroom Renovation? Complete Overview – J. A. Kelly Contracting Services
- 7 Essential Bathroom Remodel Tips Every Homeowner Needs – J. A. Kelly Contracting Services
- 7 Essential Kitchen Renovation Ideas for Homeowners – J. A. Kelly Contracting Services
- What Is Home Renovation? Complete Guide for Homeowners – J. A. Kelly Contracting Services
- Bathroom Floor Tile and Shower Wall Remodel Time
- Carrara Marble Revitalizes a Dark Bathroom